Bulk Create Thank You Cards in Canva
Nothing beats a handwritten thank-you card, but when you’re a teacher, you might have an overwhelming number of cards to write. If you’re like me, your handwriting becomes harder and harder to read the more you write. If you’re okay with typed messages, then let me show you how to use Canva to design, personalize, and print a set of personalized thank-yous.
This is going to involve Bulk Create, an app inside Canva. Bulk Create requires a Canva Pro or Canva for Education account. Qualifying K-12 teachers can get Canva for Education free. Bulk Create does not work in Canva’s mobile apps. You’ve got to be using the desktop version.
Create a new design
Go to Canva.com and create a new Custom Size design.
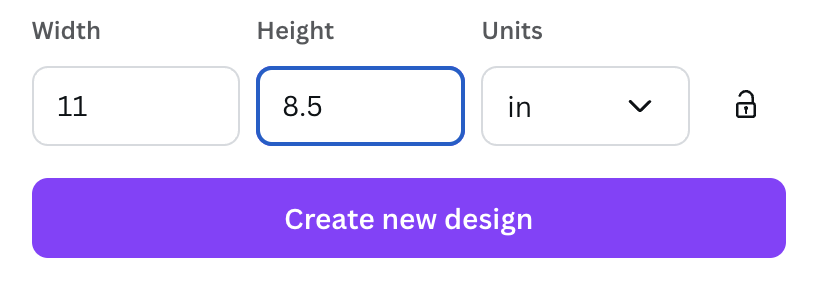
Change the units to inches and input 11 for the width and 8.5 for the height.
Click the Create new design button.
Divide the page into fourths
Click the File menu, choose Settings, and click Add guides.
Select Custom. Change to 2 columns and 2 rows. Set the gap and margin to zero.
Click Add guides.
Purple lines are visible on the page, but they are not part of the design. They won’t be visible when you download and print.
Design the front
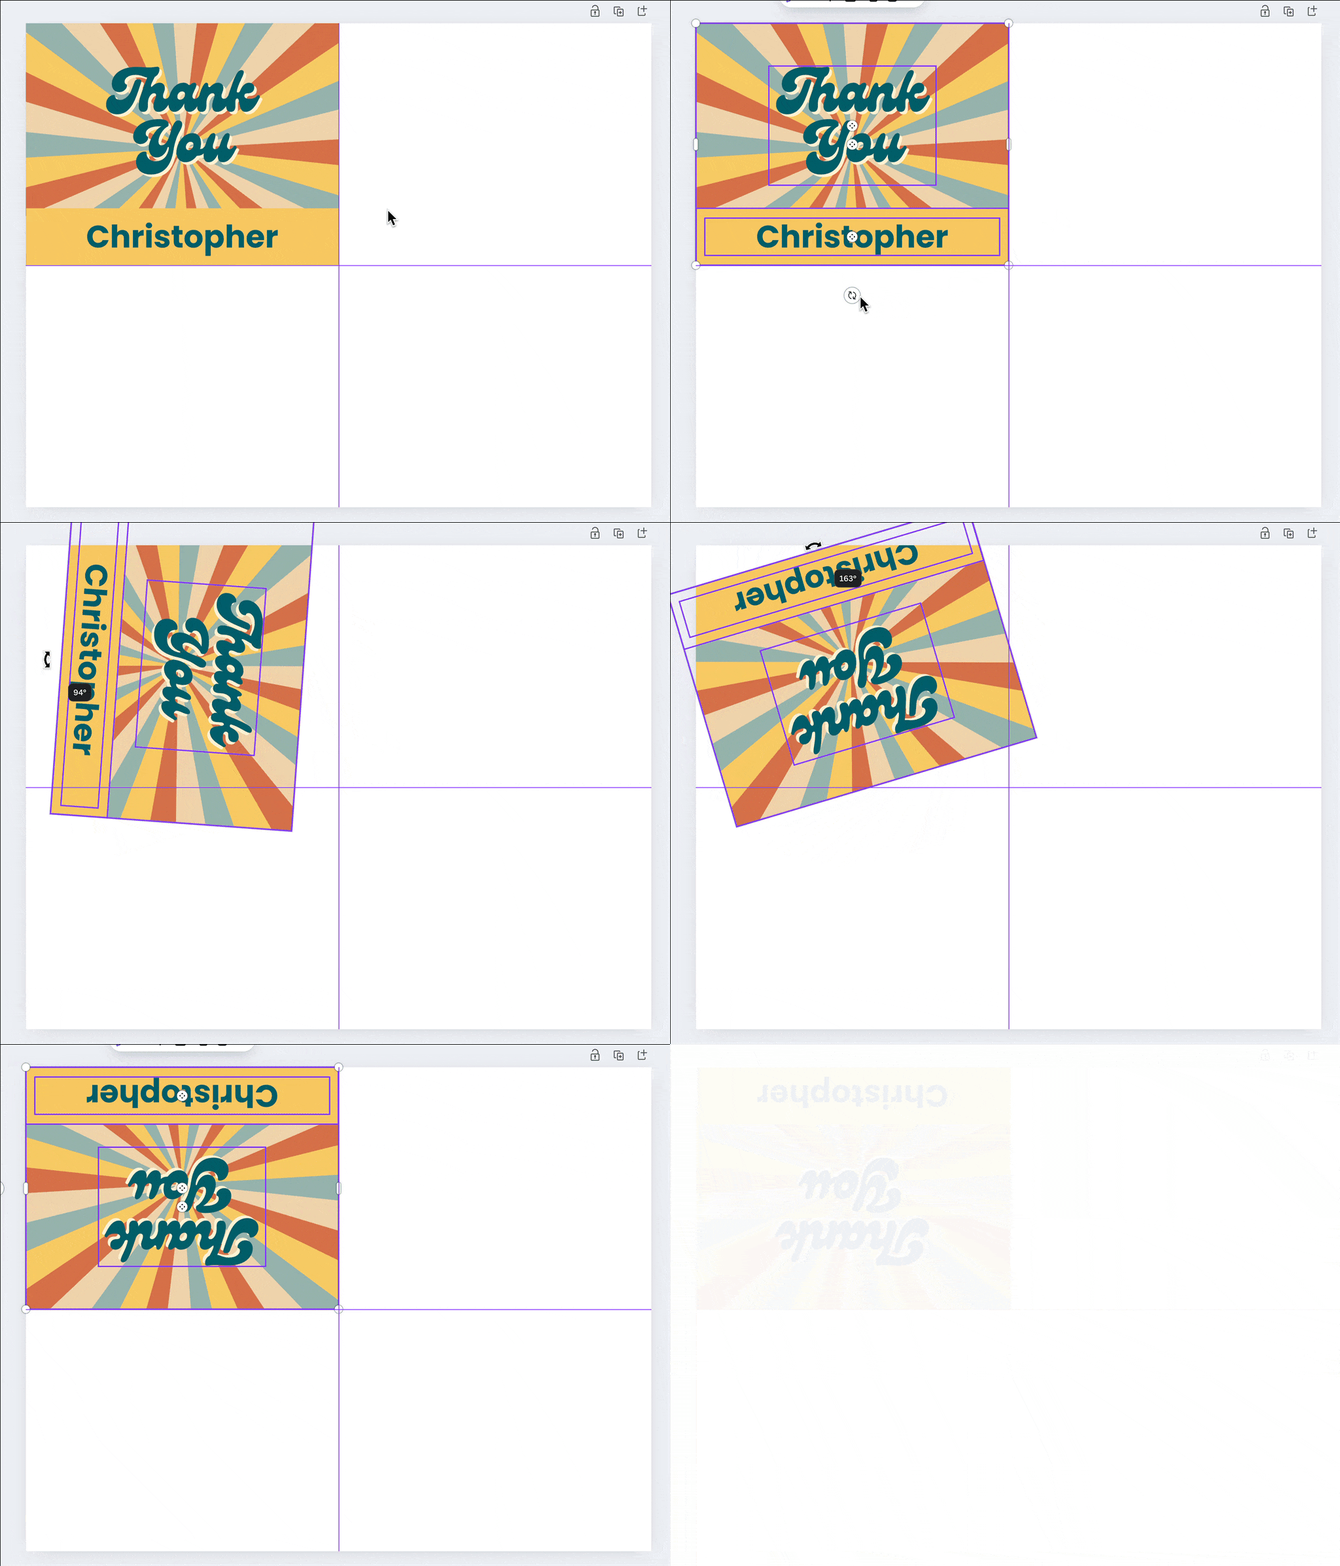
Design the front of the card in the top right quadrant. Insert a Canva template or combine texts, shapes, and elements to make your own creation. I like to include the recipient’s name on the front of the card. I enter a name—a name that is the longest I might input. That was if “Christopher” fits in the text box, I know all the other names will also fit.
After you’re done working on the front of the card, do a Select All (Control or Command + A) and drag the rotation handle to turn everything upside down.
Design the inside
Add separate text boxes for the date, recipient’s name, and message. Write a sample message that will be the longest that all of your cards will contain. That way you know that everyone one of your messages will fit within the text box.
Also add a closing. You might sign your name by drawing with the pen tool or using a handwritten font. Or, you might consider leaving the signature blank, leaving space for you to sign after it has been printed.
If you’d rather skip the above design steps, you can make a copy of my Thank You Card template in Canva, make any changes, and continue the process below.
Compose messages
Create a spreadsheet in Google Sheets, Excel, or Numbers. Create columns for Date, Name, Dear Name, and Message.
Each row will eventually be turned into a printed thank-you card.
What’s with the Dear Name column? When we use Bulk Create, we must replace all the text in a text box. So, this column contains the entire greeting. For example, you would type out “Dear Christopher,” making sure to include the comma so that the commas make it into the text box.
After you’ve entered a row for all of the thank-you cards you intend to make, save the spreadsheet as an XLSX or CSV file to your desktop. You will be uploading this file to Canva.
Tip: If it’s easier for you, you can create a Google Form with questions for date, name, and message. Then, send it to create a spreadsheet for the form.
Bulk create
While inside your Canva card design, click Apps in the side bar.
Type “Bulk create” and press Enter or Return on your keyboard.
Click the Bulk create icon.
Click the Update data button.
Choose the XLSX or CSV file that you saved to your desktop.
Right-click the date text box in your design, choose Connect Data, and click the Date field from the pop up box.
Right-click the Dear text box in your design, choose Connect Data, and click the Dear Name field from the pop up box.
Right-click the message text box in your design, choose Connect Data, and click the Message field from the pop up box.
Right-click the upside down name text box in your design, choose Connect Data, and click the Name field from the pop up box.
Click the Continue button in the side bar and click the Generate designs button.
A new Cava design opens. Each page of the design is a different thank you card.
Download and print
Click the File menu and choose Download. Change the File type to PDF Print.
Click Download and save your PDF.
Open the PDF in whatever app views your PDFs.
Print the PDF.
Fold each card
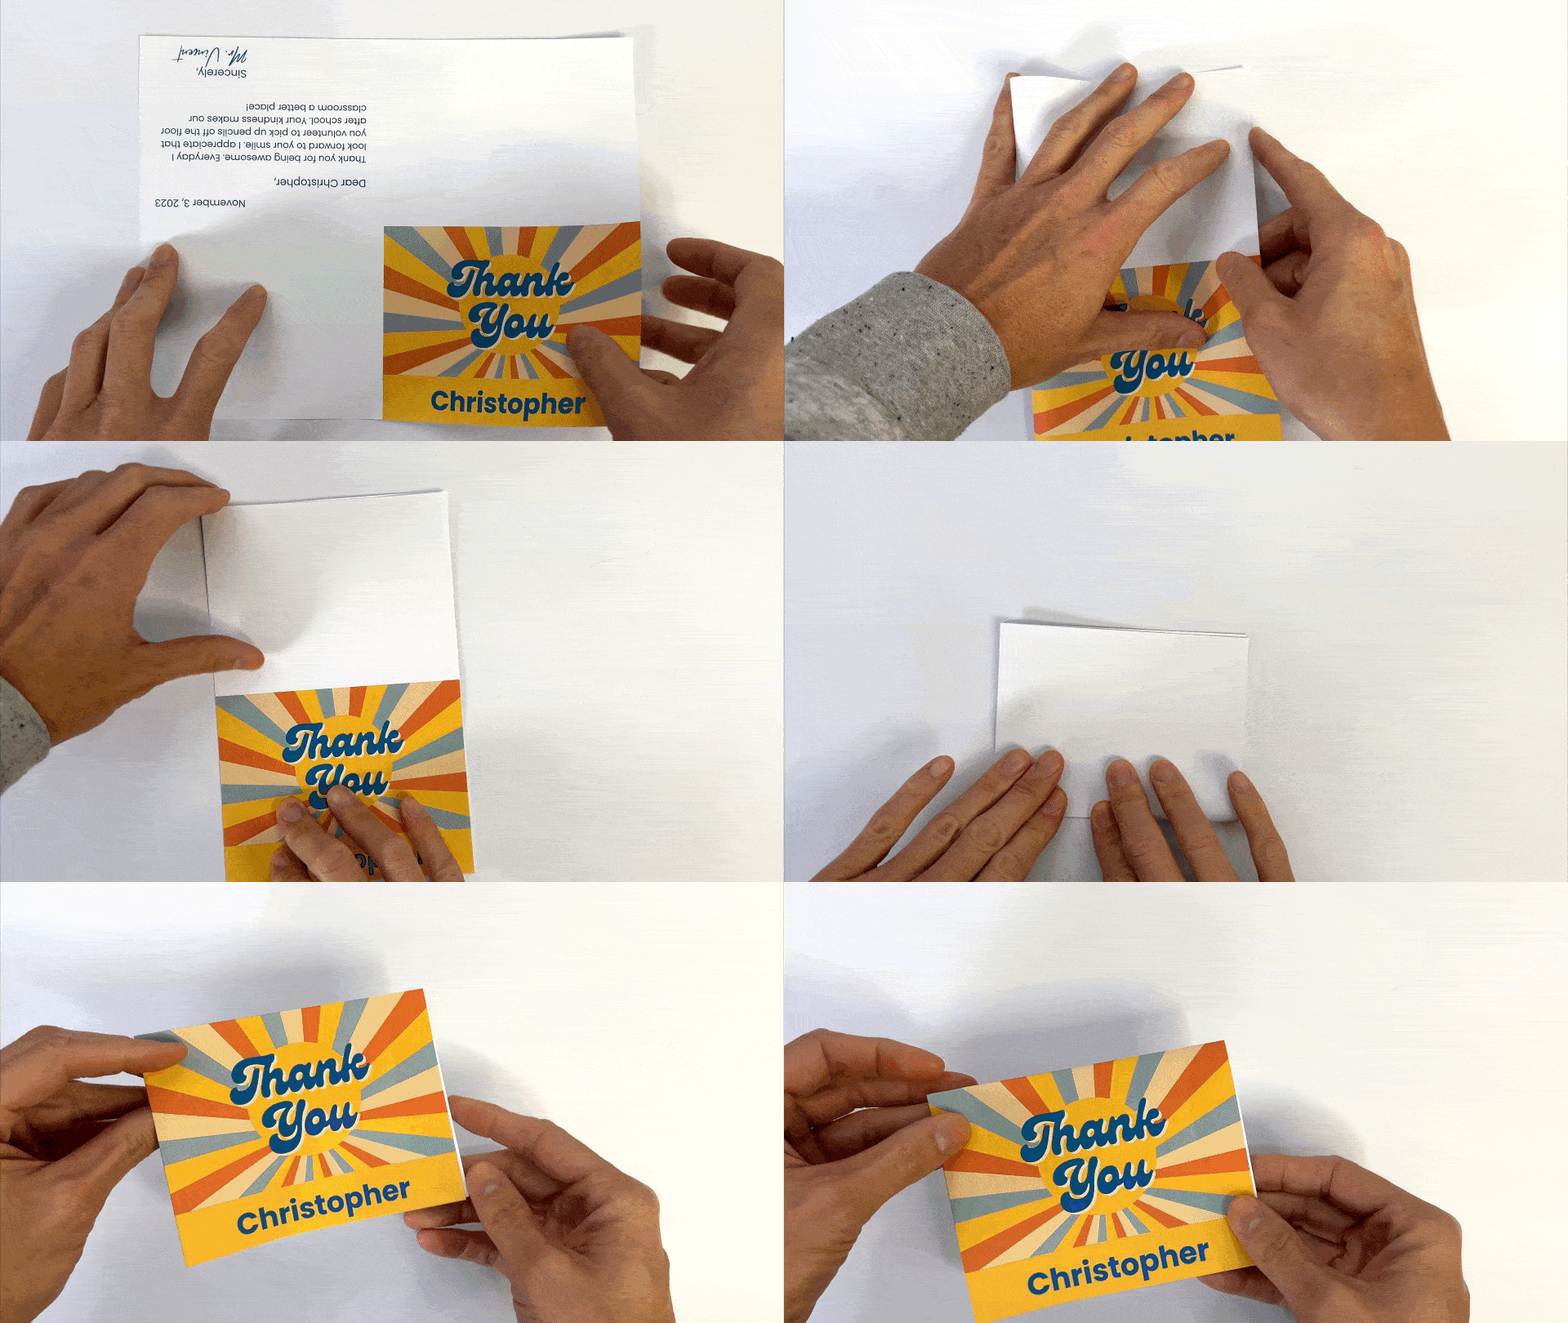
Fold the paper in half, with the printed sides on the outside.
Fold in half again to complete the card.
Yes, is does take several steps to bulk create a batch of thank you cards. After you do it once, you can use your design over and over again, saving you time. And, the bulk create feature can be used in a similar way to produce certificates, personalized learning materials, and student-specific assignments.


